
Local Coordinators FAQs

Browse and search frequently asked questions.

Create and manage service provider accounts in LibraryH3lp

2280 views   |   0 Vote this question as useful.   0 Vote this question as not useful.   |   Last updated on Jun 14, 2022    Accounts

Create New Service Provider Accounts (New Version)

Note: These instructions are to create accounts using the current version (as of May 2022) of the Users Management page.

  1. Login to the LibraryH3lp Dashboard with your institution’s admin account (e.g. kpu-admin)
  2. In the left-hand navigation menu, click Users


  1. Click


  1. Enter a Username according to the following format:


  • institution-firstname-lastinitial (e.g. kpu-sadie-p)


  1. Enter a Password, re-type to match, then press next


  1. Enter an email address, then press next


  • Adding an email address will allow the account user to use the 'forgot password' and 'forgot username' features


  1. Click to check the box for ‘Yes. Copy another user’s settings as a starting point’. Copying settings from a pre-existing user account is recommended


  • When the box is checked, a drop-down menu appears where you can select a user to copy user settings from. Select a service provider (not a local coordinator) user to copy, then press next.
  • Settings that will be copied include queue assignment (Step 8) and canned message pools (Step 10)
  • You can start typing in the drop-down to search the list for users with your institution’s abbreviation, or by a specific user’s name


  1. Assign the appropriate queues for the user account. Use the searchable drop down menu to select the queues relevant to your institution, then click next.


  • These may already be populated. Double check that the assignments are correct, then click next.
  • Remember: proactive chat has a separate queue, ensure that this queue is assigned if applicable.


  1. For this step you will see the following screen. Press Next, these settings may be left as they are.


  1. Leave the box checked for 'Assign (user) to all canned messages pools' and press next.


  • Institutional canned message pools are assigned automatically (if applicable) by copying settings from a pre-existing user.


  1. No Need to create a conference room, click next.


  1. Select . The wizard will take you to a summary page where a breakdown of the chosen settings is displayed, and changes can be made if need be.


Edit an Existing Account

  1. Login to the LibraryH3lp Dashboard with your institution's admin account (e.g. kpu-admin)

  2. In the left-hand navigation menu, click Users:

  3. Use the search function to look up the user you wish to edit.

Here you can do the following:

To change account settings, select the gear beside the username:

  • Change the email address associated with the account

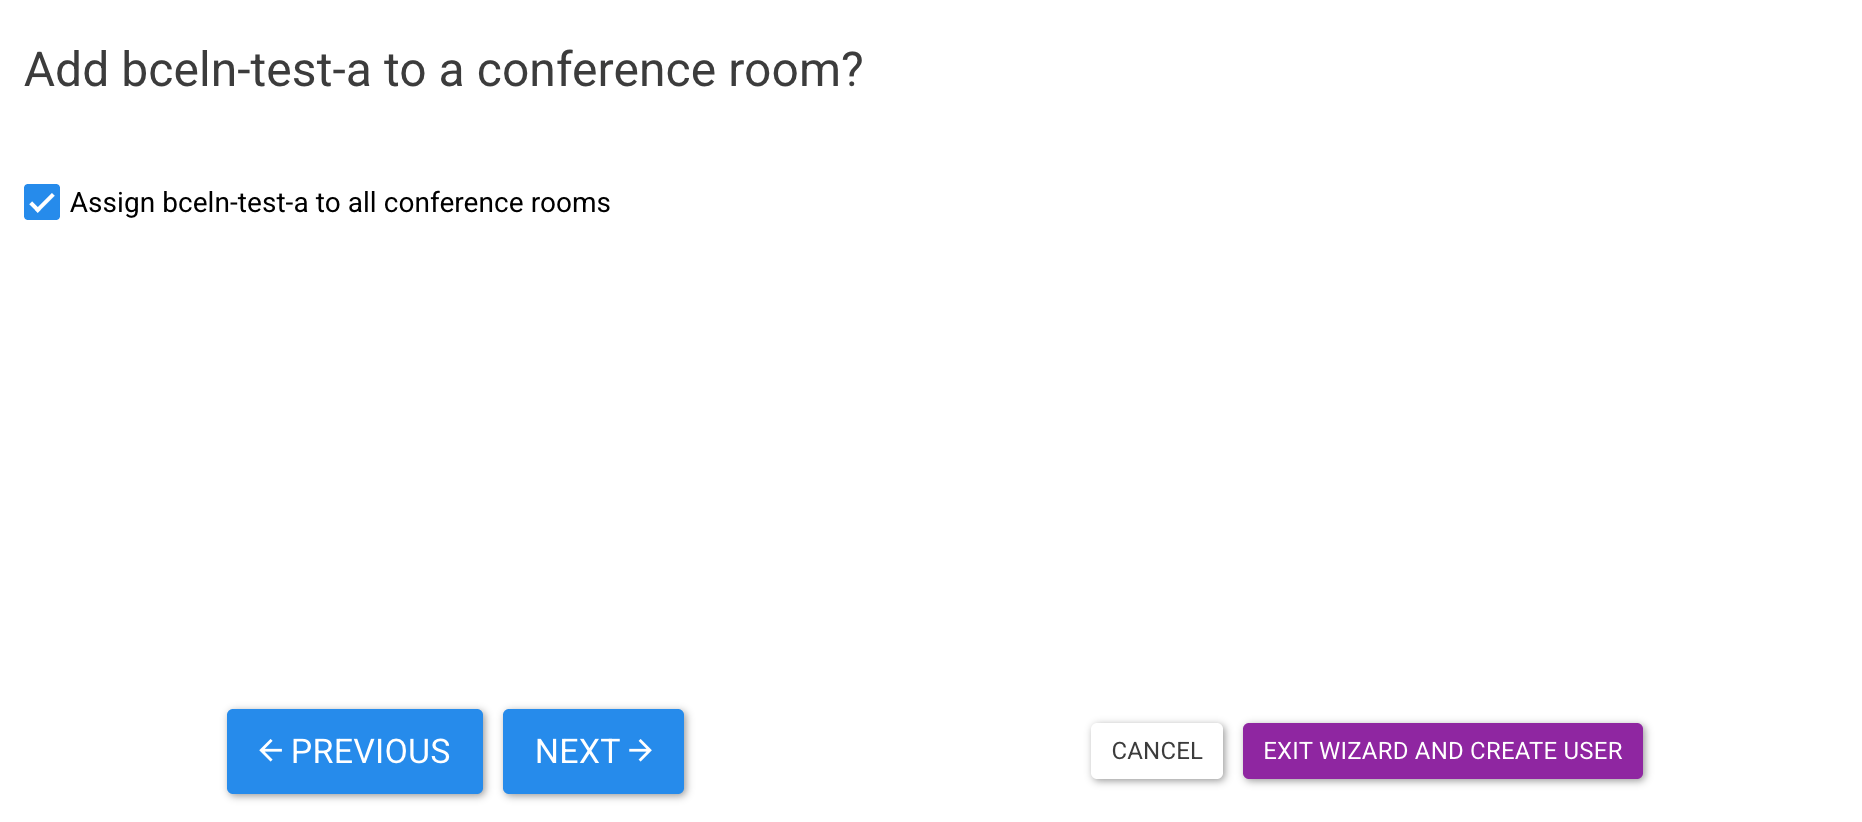
  • Change Queue Assignments

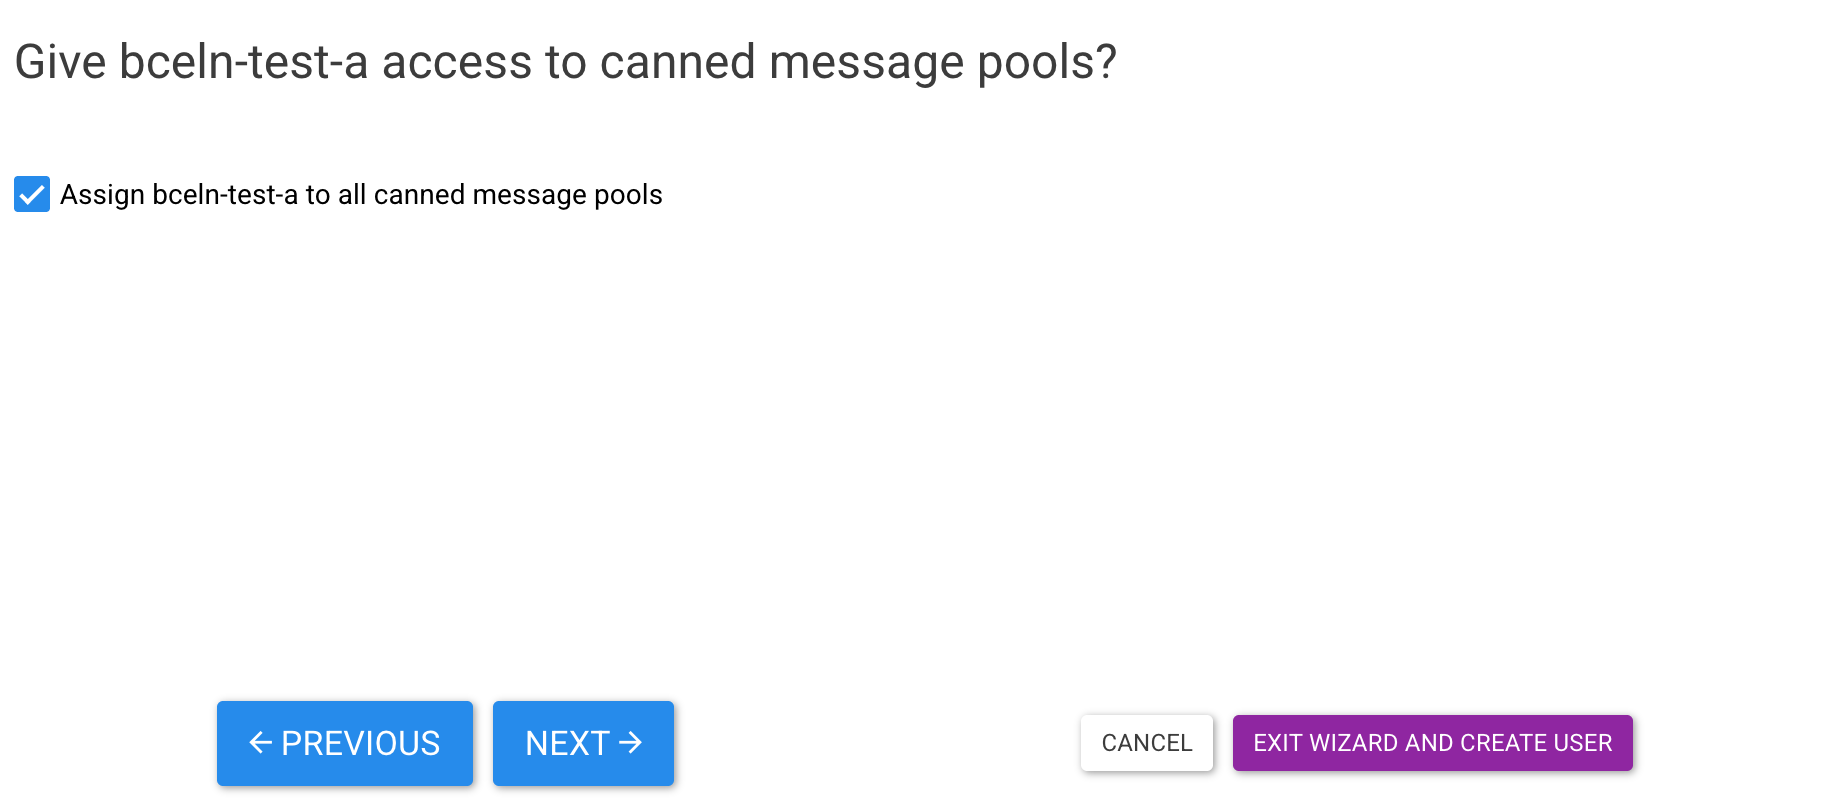
  • Change the Canned Message pool assignments

To change account the password, click the key beside the username:


Reset Service Provider Passwords

  1. You can change a service provider password using the steps above for "Edit an Existing Account"
  2. If a service provider has forgotten their password, they can use the "Forgot your username?" or "Forgot your password?" option on the Webclient login page.


Delete Service Provider Accounts

  1. Login to the LibraryH3lp Dashboard with your institution's admin account (e.g. kpu-admin)
  2. In the left-hand navigation menu, click Users:
  3. Use the search function to look up the user you wish to edit.  

  1. Click to check the box to the left of the user you wish to delete, then click the red trashcan button. Select ‘yes’ on the pop-up to complete the action.

read more

Create and manage service provider accounts on the AskAway staff website

2089 views   |   0 Vote this question as useful.   0 Vote this question as not useful.   |   Last updated on Jul 20, 2022    Accounts

New service providers at your library will require an account on the AskAway staff website. This account will:

Create a new account

  1. Login to the AskAway website with your local coordinator account
  2. Click the "My service providers" shortcut in the menu at the very top, on the left-hand side
  3. This brings you to a page listing service providers at your library and their roles, with a link to edit each one
  4. To add a new service provider, scroll to the bottom and click the link "add a new service provider"
    1. Select Yes or No for mailing lists you would like them to be subscribed to:
      • All service providers should be subscribed to the Service Providers' list
      • Evening and weekend service providers should *also* be subscribed to the Evenings / Weekends list
      • If they are not a local coordinator, select No for the Local Coordinators' list
    2. Enter the required information and select "Notify user of new account"
    3. Under Roles, select the appropriate roles:
      • All service providers have the service provider role
      • Evening and weekend service providers *also* have the service provider - evenings/weekends role
    4. Select your institution from the Institution drop-down
    5. Enter the new service provider's LibraryH3lp username
    6. Click "Create new account"

Edit existing account

Note: To change the service provider's mailing list subscriptions or to delete an account, see the sections below.

  1. Login to the AskAway website with your local coordinator account
  2. Click the "My service providers" shortcut in the menu at the very top, on the left-hand side
  3. This brings you to a page listing service providers at your library and their roles, with a link to edit each one
  4. Click "edit"
  5. Make any changes as needed (e.g. updating the email address)
  6. Click "Save" to save changes

Request a new password

To request a new password, visit the request new password page.

Temporarily unsubscribe from mailing list(s)

If you'd like to temporarily unsubscribe a service provider from a mailing list, follow these steps:

  1. Login to the AskAway website with your local coordinator account
  2. Click the "My Service Providers" shortcut in the top left
  3. Find the service provider in the list and click "edit" to edit their account
  4. Under "Mailing Lists," select the "Unsubscribe" button to unsubscribe them from the appropriate lists
  5. Click "Save" to save your changes

When the service provider returns to AskAway, simply resubscribe them to the mailing lists.

Delete an account

Please keep your list of service providers up to date.

To delete a service provider account, follow these steps (Note: Do NOT delete local coordinator accounts or accounts that may have belonged to a local coordinator. Instead, contact the Admin Centre and we will remove this account):

  1. Login to the AskAway website with your local coordinator account
  2. Click the "My service providers" shortcut in the top left
  3. Find the service provider in the list and click "edit" to edit their account
  4. Scroll to the bottom of their profile and click "Cancel account"
  5. Select "Delete the account and its content"
    • If you think the service provider may have created content on the website such as written a blog post, select "Delete the account and make its content belong to the Anonymous user"
    • Note: Do NOT delete local coordinator accounts or accounts that may have belonged to a local coordinator. Instead, contact the Admin Centre.
  6. Click "Cancel account"
read more

Access your library's chat snippet

1532 views   |   0 Vote this question as useful.   0 Vote this question as not useful.   |   Last updated on Feb 25, 2021    Widgets

The LibraryH3lp chat snippet is the code that you use to embed an AskAway chat box, button, or tab on your library's website, in databases, etc.

Follow these steps to retrieve your library's chat snippet:

  1. Login to the LibraryH3lp admin dashboard with your library's admin account
  2. In the left-hand navigation, click Chat Snippets (the < > icon)
  3. You should only see your library's chat snippets listed
  4. Click on the snippet you would like to view (embedded chat box, button, or tab)
  5. Copy the code in the grey box and paste it wherever you need to embed the widget

Note: The snippet embed code is identical for all libraries except for the unique snippet ID number. In the example below, the unique snippet ID number for this library's embedded chat box is 806 (in bold).

<!-- Place this div in your web page where you want your chat widget to appear. -->
<div class="needs-js">Chat loading...</div>

<!-- Place this script as near to the end of your BODY as possible. -->
<script type="text/javascript">
  (function() {
    var x = document.createElement("script"); x.type = "text/javascript"; x.async = true;
    x.src = (document.location.protocol === "https:" ? "https://" : "http://") + "ca.libraryh3lp.com/js/libraryh3lp.js?806";
    var y = document.getElementsByTagName("script")[0]; y.parentNode.insertBefore(x, y);
  })();
</script>

If you would like assistance customizing your library's AskAway entry point, please contact the Admin Centre and we'll be happy to help!

read more

View and download usage statistics for your library

1353 views   |   0 Vote this question as useful.   0 Vote this question as not useful.   |   Last updated on Jan 30, 2024    Statistics

This FAQ walks through the steps to view and download usage statistics for your library.

For session data, see the FAQ View and download session data for your library.

View and download usage statistics

1. Login to the LibraryH3lp dashboard with your LibraryH3lp admin account

2. Navigate to Chat Reports  in the left-hand menu. You'll be directed to the Report Options screen

3. There are a number of different reports you can run, view, and download: ‌

  • Choose the report you would like to generate from the drop down menu:
    • Recommended Reports:
      • Chats Per Month
      • Chats Per Operator
      • Chats Per Queue
    • Non-recommended Reports: 
      • Chats Per Protocol (all chats are generally web protocol)
      • Chats Per Profile (does not provide additional information)
  • Enter a Start Date and End Date
  • Minimum Chat Duration OR Include Not Answered
    • You can decide if you would like to include chats that were not answered (i.e., no chat duration), or set a minimum chat duration
      • Note: To include all chats, select "Include Not Answered"
    • Minimum Chat Duration
      • You can set the minimum chat duration of chats to be included in the report, in seconds
      • By default, this is set to 45 seconds
  • Select the appropriate queue(s)
    • There are two approaches to selecting queues:
      • If you want usage data for the full AskAway service:
        • Use the 'Queue' heading to select all queues
        • Deselect askaway-practice, askaway-testing, and askaway-testing-proactive to remove chats from training and practice sessions


  • ​​If you want usage data for your institution only: 
    • Use the 'Queue' heading to deselect all queues
    • Scroll through and select the queue for your institution
    • Remember to also select the proactive chat queue, if applicable for your institution 

  • Click Generate Report

4. The results will generate:

  • Chats Per Month: the total number of chats AskAway received from the selected queues, per month, displayed in a graph. A spreadsheet with the data is also available below the graph. 
  • Chats Per Operator: a spreadsheet with information about the number of chats handled by an operator, based on the selected queues. This sheet can be sorted alphabetically from the operator column, which will group operators from the same institution together.
    • Note: The Chat per Operator report does NOT include unanswered chats (i.e., chats that have no operator). To see how many chats have no operator assigned, download session data and look for chats that have no duration or wait time assigned.
  • Chats Per Queue: a graphical representation of the total number of chats AskAway received from the selected queues within the selected time frame. A spreadsheet with the data is also available below the graph.
Example Chats Per Month graph:


5. To download the data, click the    button at the bottom right

read more

Embed AskAway in EBSCO databases

1202 views   |   0 Vote this question as useful.   0 Vote this question as not useful.   |   Last updated on Jul 30, 2021    EBSCO Widgets

Embedding your library's chat boxes in EBSCO is a great way to increase AskAway's visibility at your library and allows students to access chat support when they need it most: while researching.

Steps to add LibraryH3lp chat box to EBSCO sidebar:

1. Login to your library's EBSCO Admin

2. Click the Viewing Results tab

3. Beside Widgets click Modify

4. From the Custom Widgets for: drop-down, select where you'd like the widget to display (Result List or Detailed Record)

5. To add a new widget, click Add Item and then select or enter the following:

  • Select the Custom HTML radio button
  • In the Label field add a name for your widget (e.g. Research Help)
  • Enter a Height (e.g. 300)
  • Enter your library's Custom HTML
    • ​​This is the LibraryH3lp chat snippet (i.e. code) for your library's embedded chat box. If you have have any questions about how to retrieve this code, please contact the Admin Centre.

Note: The example above uses code for the AskAway practice chat box

6. Click Submit to save your changes

7. Select the following:

  • Select the Yes radio button so the widget opens by default
  • Check the Show box to enable the widget

8. Click Submit again to save your changes

9. Wait approx. 5 minutes for changes to take effect

10. Test the widget to make sure chats are coming through and to see how the chat box displays when the service is both open and closed

See also EBSCO's documentation for adding widgets

~ ~ ~

Steps to add LibraryH3lp chat tab to EBSCO footer:

This document from LibraryH3lp has steps (with screenshots) for adding the chat tab to EBSCO. Steps are also shared below.

  1. Login to your library's EBSCO Admin
  2. Click the Branding tab
  3. Under Bottom Branding click Modify (also make note of which current "Bottom Branding Version" you have selected)
  4. Click to "modify branding" of your current Bottom Branding Version or "Add New Branding" if you don't have anything selected
  5. Paste LibraryH3lp embed code for your library's chat tab into the Enter Custom Text box after any pre-existing code
    • The embed code is the LibraryH3lp chat snippet for your library's chat tab
  6. The type of text is HTML
  7. Select the screens where you'd like it to display
  8. Click Submit to save your changes 
  9. Wait approx. 5 minutes for changes to take effect
  10. Test the widget to make sure chats are coming through and to see how it displays when the service is open and closed

Questions?

If you have any questions or would like help embedding widgets in EBSCO, contact the Admin Centre and we'll be happy to help.

read more

Embed AskAway in ProQuest databases

1171 views   |   0 Vote this question as useful.   0 Vote this question as not useful.   |   Last updated on May 26, 2021    ProQuest Widgets

Embedding your library's chat boxes in ProQuest is a great way to increase AskAway's visibility at your library and allows students to access chat support when they need it most: while researching.

Steps to add LibraryH3lp widgets to ProQuest

1. ​Login to your library's ProQuest Admin Module

2. Navigate to User Interface / Branding

3. Click the Widgets tab and then Add widget

4. Fill out the widget fields:

  • In the Link text field, enter a title for the chat box (e.g. Research Help)
  • In the HTML code field, enter your library's embedded chat box snippet
  • Add widget Width and Height
  • Check off Include widget directly on results page

5. Click Save Changes

6. Test the widget to make sure chats are coming through and to see how it displays when the service is open and closed (see this LibraryH3lp FAQ for ProQuest testing tips)

read more

View and download session data for your library

1159 views   |   0 Vote this question as useful.   0 Vote this question as not useful.   |   Last updated on Mar 26, 2024    Session Data Transcripts Statistics

This FAQ covers session data. Session data provides data on each chat session and includes the following:

  • Date and time each chat arrived
  • Student's institution
  • Wait time and session duration
  • Referrer
  • Tags

To learn how to gather usage statistics, see the FAQ View and download usage statistics for your library.

View session data

1. Login to the LibraryH3lp dashboard with your LibraryH3lp admin account

2. Navigate to Chat History in the left-hand menu 

  • Note: the Chat History and Activity area includes transcripts and session data for all AskAway institutions.
  • Please *do not* delete anything!

3. To narrow down results for your library, you will need to conduct an Advanced Search of session data and transcripts by clicking the drop-down arrow to the right of the search bar

4. There are many options for limiting your search, but here are some ways to narrow your results that you may find helpful:

  • from date / to date:
    • Narrow your search within a date range
  • queue*:
    • Enter your library's queue acronym to limit to results from your library only (e.g. unbc)
    • To search multiple queues, put a comma between each queue (e.g. unbc, unbc-proactive)
  • referrer*:
    • To see calls originating from a particular webpage, enter a referring URL
  • tag*:
    • To see calls by descriptive tag (e.g. research, citation, referred, etc.)
    • Note: If you see any chats with the "Follow-up" tag, this is a LibraryH3lp system tag that is not used by AskAway and may have been applied accidentally.
    • See a complete list of AskAway tags and their definitions.
      • To search for a Discontinued Tag, type the full name of the tag in this field

5. Most fields can be searched with the following wildcards and boolean:

  • * for partial matches (e.g. bird* for birds, birding, birder etc.)
  • ? to replace any single character (e.g. b?rd)
  • ! to omit exact matches (e.g. use !chat to omit results that contain the word chat)
  • " " to search a phrase (e.g. "house finch")

6. Once you've set your search parameters, click the blue search button to retrieve results 


Download session data and transcripts

1. To download session data and transcripts (after you've narrowed the list of results), click the blue "download all chats" button

2. Decide if you would like to download metadata only or the transcripts too

3. Select which data you would like to include or exclude

  • The following fields are recommended:
    • queue
    • date and/or time started
    • wait
    • duration
    • referrer
    • tags

4. If you have chosen to download transcripts, at this step you will need to select a file type for the download. The default file type for metadata download is CSV.

  • You can also decide if you would like to hide the name of the service provider (operator)

5. Click  and this will download a file to your local computer

6. Once downloaded, you may wish to delete any questions with the "practice" and/or "test" tags

7. You may also wish to add meaningful headings in your downloaded spreadsheet, for example:

  • started, date and time combined > Date and Time Started
  • queue > Institution
  • duration > Session Duration
  • wait > Wait Time
  • tags > Tags
  • referrer > Referring URL
read more

Update your library's guest logins

1061 views   |   0 Vote this question as useful.   0 Vote this question as not useful.   |   Last updated on Sep 16, 2019    Guest Logins

Guest logins for all participating AskAway libraries are available on the guest logins page (login required to view).

If you need to update the guest logins and/or the notes for your library, follow these steps:

  1. Login to the AskAway staff website with your local coordinator account
  2. In the top left corner, click the "Edit library info" shortcut
  3. Here you can update information for your library, including Guest Login User ID, Password, and Notes
  4. Click Save
  5. The changes will now be reflected on the guest logins page
read more

Create institutional scripts (canned messages)

1051 views   |   0 Vote this question as useful.   0 Vote this question as not useful.   |   Last updated on Jun 21, 2022    Scripts

If you'd like to create institutional scripts for your library's service providers to access, follow these steps:

  1. Login to the LibraryH3lp Dashboard with your library's admin account
  2. In the left-hand menu, navigate to Canned Messages
  3. If you have no institutional canned messages, you'll need to first create a new message pool by clicking
  4. Give your new message pool a name (this should be the name of your institution, e.g. SFU)
  5. Leave "Assign all users" checked off
    • Note: this will ensure all service providers at your institution can access these canned messages.
  6. Click Ok
  7. Under "Canned messages in [institution]" click the  button to add new messages
  8. Add the text of your canned message
  9. To delete a message, click the trash can

Note: Institutional scripts will only be available to service providers at your institution and not all AskAway service providers.

read more

Update your library's policy page URL

1035 views   |   0 Vote this question as useful.   0 Vote this question as not useful.   |   Last updated on May 13, 2022    Policy Page

If your library has a new link to its Policy Page, you'll need to update it in two places:

Library Policy Pages page on the AskAway website:

  1. Log into the AskAway staff website
  2. Navigate to your library's Edit Library Info page
  3. Here you can change the Policy Page URL
  4. Click Save to save your changes, and they will be reflected on the Policy Pages page

LibraryH3lp Policy Pages link:

  1. Log into your library's LibraryH3lp admin account via the Dashboard
  2. Navigate to Queues in the left-hand menu
  3. Open the folder "AskAway Queues"
  4. Select your library
  5. In the Profiles area, update the profile URL for your library
    • You should be able to update the link using either the "Hyperlink" or "Source Edit" button in the editor
  6. Click Save
  7. The updated policy page URL will now be available to service providers in LibraryH3lp

Your library's policy page will now be correctly linked from two places:

read more

Customize the appearance of your library's chat boxes

988 views   |   0 Vote this question as useful.   0 Vote this question as not useful.   |   Last updated on Sep 23, 2019    Widgets

What this FAQ covers

This FAQ covers how you can make changes to the appearance of your library's chat box when the service is online.

In the LibraryH3lp dashboard, this is done using what's called the chat skins tool.

Some context...

Your library's chat service in LibraryH3lp has two major elements - a queue and a chat box skin. The queue is tied to your institution and determines how chats are routed. The chat box skin determines what the chat box looks like.

The chat snippet combines a queue and a chat box skin and gives you the embed code you need to add chat to your library's website, in databases, etc. To learn how to access your library's chat snippet, see the FAQ Access your library's chat snippet. To learn how to edit an existing or create a new chat snippet for your library, see the FAQ Edit or create a new embedded chat box for your library.


Chat Skins

The chat skins tool is where you can change the appearance of the chat box that displays to students when the service is online.

Before making any changes to your library's chat skin, it's highly recommended that you first create a copy of your library's current skin so that you're not making changes to the chat box that is live and up on your websites. Creating a copy will also give you all of the customizations for the default AskAway widget, which is a highly customized version of the default LibraryH3lp chat box.

Create a copy of your library's chat skin

  1. Login to the LibraryH3lp Dashboard
  2. Navigate to the "Chat Skins" area in the left-hand menu (look for the paintbrush icon)
  3. Select your library's widget from the "Widget:" drop-down (e.g. KPU AskAway watermark/feedback)
  4. Note the 5-digit unique ID number (write it down)
  5. Click "Copy Widget"
  6. The widget is now copied and you should see a new unique ID beside the widget name
  7. Change the name of the widget so that you can easily recognize it. For example, add Copy to the title or give it a descriptive name with your institutional acronym (e.g. KPU brand color)
  8. Take note of the new widget ID number (write it down)
  9. Click "Save Widget"

You now have a copy of your library's default chat skin and you can play around with it without affecting the appearance of the chat boxes that are live on your library's website.

There are several quick and easy changes that you can make to customize your library's chat box:

Branding

  • Title
    • You may want to change this to something shorter and descriptive (e.g. Ask a Librarian, Research Help, Chat Now) as the longer title looks squished in some sidebars, especially in databases
  • Typing Notification Identity
    • You could change this to something more inclusive than Librarian (e.g. Library Staff)

Frame

  • Background color
    • Here you can change the color of the chat box. This color must be a hex color code. You may wish to change it to your institutional brand colors.

Wicked CSS Hack

Since AskAway chat boxes are highly customized, there are some things you'll have to change here instead of in the fields above.

Here are a few simple changes you could make to the wicked CSS hack code:

  • Title color
    • Search for the header "h1"
    • Beside color: you can enter a new color for the title (must be hex color code)
  • Sprites (these are the icons for volume, email for transcript, and to pop-out chat)
    • Search for "span.sprite"
    • In the png URL that follows, change to either light_sprite (this will be white) or dark_sprite (this will be black)
  • Feedback link
    • Search for "a#feedback"
    • Beside color: you can enter a new color for the feedback link (must be hex color code and change to either black #000000 or white #FFFFFF to match the sprites)

***Click "Save Widget" to save any changes***

Preview changes

You can preview most of the changes you make live in the chat skins tool. However, the preview chat box won't show all of the features (e.g. the feedback link is missing). To preview your changes and to see a fully rendered version of the chat box, follow these steps:

  1. Click on the "Queues" area in the left-hand menu
  2. Open the "AskAway Queues" folder
  3. Click on your "institution's queue"
  4. Open the "Queue URL" in a new tab
  5. At the end of the URL, add the following: ?skin=##### (the #s will be the 5-digit skin ID of the chat skin you're working on)
  6. When you reload the page, you'll see a rendered version of the chat box, with any changes you've made now visible

Implement new chat skin in chat snippet

If you would like to use the new chat skin you've created in a chat snippet, please see the FAQ Edit or create a new embedded chat box for your library.

read more

Change chat box offline message

969 views   |   0 Vote this question as useful.   0 Vote this question as not useful.   |   Last updated on Sep 23, 2019   

The offline message is the message that displays on chat boxes when the service is closed for the day or between terms.

Currently, the AskAway Admin Centre hosts a single offline message that displays for most libraries. The Admin Centre will change this message at the beginning and end of each term to reflect that the service is open or closed.

Customize your library's offline message

If your library would like the ability to customize and control the offline message, you will need to be able to host an HTML file on a secure (HTTPS) page. The URL for the offline message will then need to be updated in your library's chat snippet.

If you'd like to look into hosting your library's offline message, please contact the Admin Centre and we can work together to set this up.

read more

Edit or create a new embedded chat box for your library

802 views   |   0 Vote this question as useful.   0 Vote this question as not useful.   |   Last updated on Oct 27, 2021    Widgets

What this FAQ covers

This FAQ covers how you can edit an existing or create a new embedded chat box (i.e. chat snippet) for your library.

There are a few situations where you might need more than one chat box for your library:

  • You need chat boxes that have different widths / heights
  • You need chat boxes that have different appearances (e.g. background color, etc.)


Chat Snippets

Edit an existing snippet

  1. To get started, login to the LibraryH3lp Dashboard 
  2. Navigate to the "Chat Snippets" area in the left-hand menu (look for the < > icon)
  3. By default, each library has three snippets:
    • Embedded chat box
      • In this FAQ, we'll cover how to make changes to the embedded chat box only, as this is the most commonly used snippet. If you'd like to make any changes to your library's chat button or tab, please contact the Admin Centre and we'll be happy to help.
    • Chat button
    • Chat tab
  4. Click your library's embedded chat box to select it
  5. Click the "EDIT" button
  6. Using widget #XXXXX:
    • If you'd like to change the chat skin that this snippet is using, click the chat box preview under "Routing for incoming chats"
    • Here you can select which chat skin you'd like to display for this snippet
    • To learn how you can change your library's chat skin and create new skins, see the FAQ Customize the appearance of your library's chat boxes
  7. Height and width
    • Here you can adjust the size of the chat box. By default the width is set to 100% so that it fills the space of any container, making it more responsive.

Create a new embedded chat box snippet

If you want to create a new embedded chat box snippet altogether, follow these steps:

  1. Login to the LibraryH3lp Dashboard 
  2. Navigate to the "Chat Snippets" area in the left-hand menu (look for the < > icon)
  3. Click the "+ADD" button
  4. Name:
    • Give your snippet a descriptive name (e.g. KPU Embedded Chat Box EBSCO)
  5. Chat widget style:
    • Select "embedded"
    • If you'd like to create a new pop-up (i.e. button or tab), please contact the Admin Centre
  6.  Routing for incoming chats
    • Make sure "Send chats to:" is set to your library's queue
  7. Click on the widget preview to select the skin you want to use
  8. Height and Width:
    • It's ideal to set the width to 100% so that the chat box will fill the space of any container, making it more responsive
  9. Please do NOT add a Service Rollover as this is configured separately by LibraryH3lp
  10. Offline appearance:
    • The current offline appearance we have for AskAway is highly customized, so you will need to go back to one of your existing embedded chat boxes and grab the code. Follow these steps to do so:
    1. Click "Save" to save the snippet you're currently working on
    2. From your list of chat snippets, select the "embedded chat box" that your library currently uses
    3. Click "EDIT"
    4. In the "Offline appearance" area, copy the code in the text box
    5. Return to the new chat snippet you just created and paste the code into the "Offline appearance" box
  11. Click "Save" to save your changes
  12. You can now grab the embed code for this new chat snippet from the main chat snippets page

Testing

Any time you make changes to your library's chat snippets or create new ones, make sure to test them when online and offline. Here are some things to look for:

  • Online: does the chat route to the appropriate queue?
  • Online: is the appearance as expected?
  • Offline: is the AskAway offline message displaying?
  • Offline: when you click the "contact us" link, does it direct to the appropriate page or email address?
read more

Access the LibraryH3lp admin dashboard

802 views   |   0 Vote this question as useful.   0 Vote this question as not useful.   |   Last updated on Jul 25, 2019    Accounts

To perform local coordinator tasks in LibraryH3lp such as creating accounts, updating your library's policy page, customizing chat boxes, etc. login to the LibraryH3lp Dashboard:

Most local coordinators will login using their library's admin account (e.g. cotr-admin) unless your personal account has been set-up with local coordinator privileges. If you'd like to set-up your personal account with local coordinator privileges, please contact the Admin Centre.

Staffing AskAway?

When you're staffing AskAway, login to the LibraryH3lp Webclient: https://ca.libraryh3lp.com/webclient/client. Please login with your personal account (rather than the admin account) as this will help your colleagues recognize who's on shift with them and will make it easier to search and identify individual service providers in saved transcripts.

Simultaneous Sign-ins

Some libraries may have more than one local coordinator account set-up in LibraryH3lp or may share a single local coordinator account. If this is the case at your library, it's okay for more than one person to be signed into the dashboard at the same time as long as you're not trying to edit the same chat skin or chat snippet simultaneously as edits could be overwritten.

read more

Train new service providers

762 views   |   0 Vote this question as useful.   0 Vote this question as not useful.   |   Last updated on Jul 25, 2019    Training

Whenever possible, the AskAway Admin Centre will offer training for new service providers in-person or online.

At the beginning of every term, the Admin Centre sends a call-out to the local coordinators mailing list to find out if any training is required. Sessions are then scheduled as needed.

If your library requires training for any service providers outside of these times, please let the Admin Centre know.

AskAway training materials are available for both new and experienced service providers to further strengthen their skills.

read more

Gather survey results for your library

727 views   |   0 Vote this question as useful.   0 Vote this question as not useful.   |   Last updated on Jul 25, 2019    Surveys Statistics

Exit survey results are posted each month on the AskAway website survey results page.

To limit to survey responses from students at your institution only, filter the "Which institution do you attend?" column and select your institution.

The AskAway surveys include information on how students learned about AskAway, why they chose the service, level of satisfaction, what they learned during their session, and more.

read more

Promote AskAway at your institution

722 views   |   0 Vote this question as useful.   0 Vote this question as not useful.   |   Last updated on Jul 25, 2019    Promotion

Information about promoting AskAway at your library as well as templates for marketing materials can be found on the AskAway website promotion page.

If you would like to place an order for marketing materials, please contact the Admin Centre. If you have any ideas or tips for promotion, let us know!

read more

View a recording of a LibraryH3lp dashboard training session

666 views   |   0 Vote this question as useful.   0 Vote this question as not useful.   |   Last updated on Jul 25, 2019    Training

If you'd like to view a recording of a past LibraryH3lp training session for local coordinators, please contact the AskAway Admin Centre.

We'll be happy to share a link to a recording.

read more

Customize your library's chat tab

632 views   |   0 Vote this question as useful.   1 Vote this question as not useful.   |   Last updated on Aug 24, 2021   

Below are steps to customize your library's out of the box chat tab to make it more visible and inviting.

Default appearance

Default online appearance (note: your library's may be a different color):

Default offline appearance:

If your library would like to customize the main default color and/or wording that displays on your library's chat tab, please contact the Admin Centre and we will ask LibraryH3lp to implement this change. Additional enhancements are shared below.

Access your library's chat tab snippet

To access the code to embed your library's chat tab, see the FAQ "Access your library's chat snippet."

~ ~ ~

Below, you'll find steps for making a number of changes to your library's chat tab to customize both its offline and online appearance. Local coordinators can make these changes themselves in the LibraryH3lp Dashboard or if you'd like assistance, the AskAway Admin Centre is always happy to help!

Offline message background color

When the service is offline and a user hovers over the chat tab, it will display the AskAway offline message. Currently, the default chat tab displays a message against a transparent background, so this will need to be changed to white so that it does not overlap with text on the library website.

Follow the steps below to make this change OR contact the AskAway Admin Centre and we can make this change for you:

1. Log into the LibraryH3lp Dashboard with your library's admin account

2. Navigate to the Chat Snippets area (< > on left side) and select your library's chat tab snippet from the list 

3. Click "Edit" to edit the chat tab snippet (note: the example below is for the AskAway practice tab)

4. Navigate to the section "What guests will see when your service is unavailable" to edit the Offline appearance

5. Under #lh3-askaway-hours, add the following code:

  • background-color: #fff;
    • This will change the background color of the offline message to white

6. Click "Save" or "Apply" to save the changes

7. Test the chat tab when the service is offline to make sure the message displays as expected

Color change on hover-over

To make the chat tab appear clickable, you can change the color on hover-over.

Follow the steps below to make this change OR contact the AskAway Admin Centre and we can make this change for you:

1. Log into the LibraryH3lp Dashboard with your library's admin account

2. Navigate to the Chat Snippets area (< > on left side) and select your library's chat tab snippet from the list 

3. Click "Edit" to edit the chat tab snippet (note: the example below is for the AskAway practice tab)

4. Navigate to the section "What guests will see when your service is unavailable" (the edit below will change the color for both the offline and online appearance)

5. Under #lh3-askaway-hours, add the following code: 

  • .libraryh3lp a:hover {
       background: rgba(29,103,134, 1);
    }
    •  Note: you can change the rgba values to match your desired hover-over color

6. You may also wish to update the color of the offline message border to match the hover-over color for consistency:

  • under #lh3-askaway-hours {, update the border color to match the color of your library's chat tab
    • In the example below, the color is #1D6786

  • under #lh3-askaway-hours:after {, update the border-top to match the border color (e.g. #1D6786;)

7. Click "Save" or "Apply" to save the changes

8. Test the chat tab when the service is both offline and online to make sure all the changes display as expected


Movement on hover-over

You can also add pop-up movement when a user hovers-over the tab.

Follow the steps below to make this change OR contact the AskAway Admin Centre and we can make this change for you:

1. Log into the LibraryH3lp Dashboard with your library's admin account

2. Navigate to the Chat Snippets area (< > on left side) and select your library's chat tab snippet from the list 

3. Click "Edit" to edit the chat tab snippet (note: the example below is for the AskAway practice tab)

4. Under .libraryh3lp a:hover {, add the following code: 

  • padding-bottom: 25px;

5. Click "Save" or "Apply" to save the changes

6. Test the chat tab when the service is both offline and online to make sure all the changes display as expected

Add a tooltip

You can also add a tooltip on hover-over to the chat tab (e.g. Click to chat with a research expert). Adding this requires more customized coding, so please contact the Admin Centre for support.

Example tooltip:

read more

Update your library's email reference address or URL

562 views   |   0 Vote this question as useful.   0 Vote this question as not useful.   |   Last updated on Apr 01, 2021   

Email reference addresses for participating libraries are available on the AskAway website. This page is also linked to in a few of the AskAway scripts.

If you need to update the email address for your library, follow these steps:

  1. Login to the AskAway staff website with your local coordinator account
  2. In the top left corner, click the "Edit library info" shortcut
  3. Here you can update information for your library, including the Email reference URL
    • ​​Note: If you're using an email address, include mailto: (e.g. mailto: ask@abc.ca)
  4. Click Save
  5. The changes will now be reflected on the Email your question page
read more

back to top